 come from a family of thrifty women. My grandma patched bed linens and darned wool socks when they wore thin. My mom made clothes for my sister using fabric salvaged from dad’s old shirts and jackets. As kids, my sister and I cut up t-shirts into strips to use for rug hooking. And, when I was six years old, my mom taught me how to knit using her stash of recycled yarn.
These days, I rarely buy new yarn – only as a very special treat – and instead recycle the knitted garments that I no longer wear. Those of you who know my knitting habits know that I love to knit large, long rectangular pieces that usually eventually develop into throws, pillowcases, and scarves. Since those pieces require quite a bit of yarn, you can often see me prowling the aisles of local thrift shops in search of high-quality sweaters in extra large sizes.
Recently, I made a trip to Goodwill in search of an inexpensive source of yarn to play with. Here is what I found for $4.99:

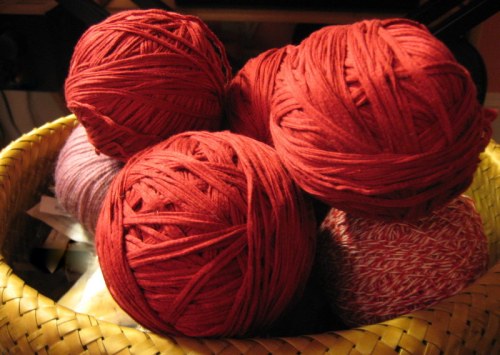
And here’s the “after” – four balls of fun, red cotton ribbon yarn:

First, some advice on finding a sweater to recycle:
1. Shape and stitch: Stick to basics – a simple pullover sweater knit from bottom up with a simple stitch will be the easiest to unravel.
2. Yarn content: While I can generally knit with wool yarn, I am allergic to the fuzz that flies around when I unravel a wool sweater. For this reason I almost never recycle wool sweaters. Also, lower quality wool tends to pile or, worse, felt. For best results, use sweaters with smooth appearance and distinct stitches.
3. Weight: Knitting with skinny yarn often yields professional looking results, but requires a lot of patience. I usually choose medium to bulkier weight to work with. In addition, thinner garments are frequently made of knit fabric that has been cut and then pieced together using a serger, which is not appropriate for recycling, which leads me to my next point…
4. Seams: This is the most important step. If you’ve ever knit a garment and pieced it together, you will have an idea of how the seams should look – each piece is knit separately, e.g. front, back, and sleeves, and then assembled.
Here are two examples of seams that work:


And here are the two that don’t:


Generally, a “good” seam’s edges can be gently separated to reveal stitching between the two parts of the garment. A “bad” seam’s edge will be finished with a serger or a zigzag stitch. This means that a garment was made of knit fabric that was cut out and then sewn together. Trying to unravel this kind of sweater will result on lots of short pieces of yarn that are pretty much useless. It is most important to check the side seams (from armpit to hem) and the sleeve seams (from armpit to cuff). .
Once you’ve found an appropriate sweater to recycle, here is THE PROCESS:
1. Undo the seams: Knitted garments are often assembled using a crochet chain stitch. Look at the either side of the seam to see if you can find something that looks like this (of course, the seam will be the same color as the garment – this is just a mock-up):

If that is the case, you can carefully cut one loop at the bottom of the garment and see if you can just pull on the end of the thread. If your sweater was assembled in some other way, or my chain-stitch-trickery doesn’t work, just use a seam ripper or small scissors to cut the threads that hold the parts together. Repeat with all other seams – sides, shoulders, and sleeves.
2. Unravel the pieces: Once you have four separate pieces (or more depending on your garment), find a loose end at the top of each piece and start unraveling. Loose ends will be woven into the knitting and therefore “hidden”, but you can carefully cut several loops and try pulling on a couple of threads at either end of the bind-off (top) row to find a starting point.
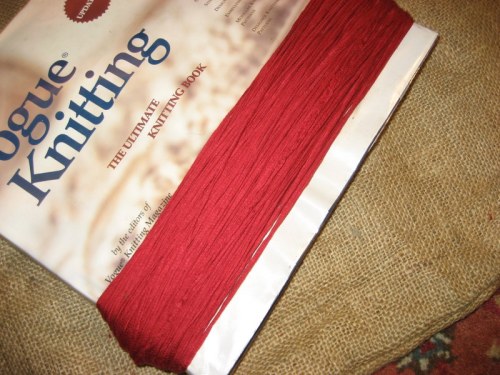
3. Relax the yarn: As you are unraveling, wind your yarn into balls to prevent tangles. If you try to knit right out of the ball, you will notice that the yarn is “curly.” For most of my projects, the curly yarn is OK as any kinks and curls usually go away after blocking. However, it is easier and more aesthetically pleasing to knit with smooth yarn. If you want to do the extra step of straightening the yarn, wind it on a board, a hardcover book, or the back of the chair, so that you have a skein of yarn to wash and dry. Here, I’ve used my super glamorous Vogue Knitting book to wind the yarn:

Take the skein off and loosely tie it in several places. Dissolve a little Woolite or your favorite shampoo in enough lukewarm water to submerge your skein. Leave the yarn in the water for several hours, making sure not to agitate the skeins too much.

After several hours, carefully remove each skein, squeeze out the water (do not wring or twist), and hang to dry. I use a weight of some sort (a can of soup works well) to straighten the kinks even better.

After the yarn is completely dry, wind it into balls and it is ready to use. Happy knitting!
I would love some comments from my readers. If you are out there, please let me know who you are and what you think!
 ooking at kitchen designs in my my nesting magazines and blogs recently, I realized that what seems appealing in the summer and spring – the clean-lined, uncluttered counters and stainless appliances – becomes cold and overly sparse in the fall and winter. Instead, I crave a little clutter, spices, fruits and vegetables on display – and some cozy kitchen textiles.


 y dear readers,
 come from a family of thrifty women. My grandma patched bed linens and darned wool socks when they wore thin. My mom made clothes for my sister using fabric salvaged from dad’s old shirts and jackets. As kids, my sister and I cut up t-shirts into strips to use for rug hooking. And, when I was six years old, my mom taught me how to knit using her stash of recycled yarn.


